Are your Samsung Galaxy S3 already upgraded to the latest ICS software update? Well, I guess that your wondering why quick search function on home screen search bar was totally removed. Usually, you can use it to look up anything on the phone like, names, contacts, apps, etc. This was intentionally removed by Samsung because Apple has filed an injunction against Samsung for the Universal Search function saying the feature infringes on Apple’s patents. Samsung taken the safe way out and totally wipe the Universal Search from the Galaxy S3.
Now if you want to restore it back without Samsung's aide, you can simply fix it by installing the GoogleQuickSearchBox.apk file on Galaxy S3.
1. Download and install ES File Explorer File Manager from Google Play store. You can also download any other file explorer that enable root access on rooted device.
2. Allow root access for ES File Explorer File Manager to complete the job. To do so, first press menu button and then tap on Settings. Locate and tick on Up to Root first and then tick on Root Explorer. A pop up massage ask you to grant the access, tap on Allow/Grant button to allow root access. Now, tick the Mount File System Option. Once all three option is ticked the way we mentioned above, you are ready to exit from Settings option.
3. Locate the GoogleQuickSearchBox.apk file in phone SD card that you copied earlier. Now long press on it and tap on Copy then. Press the Up button located at top until you reach the root of the device (you will see / at the top).
4. Reach /system/app folder and then paste GoogleQuickSearchBox.apk by tapping on Paste button located at top.
After that, long press on the copied file (i.e. GoogleQuickSearchBox.apk) and then tap on Properties option. Next, tap on Change button located under Permission section. Now, tick the Read box in front of both Group and Other [set permission to rw-r--r--]. Now tap on OK button to enable new permission setting. Quit ES Explorer now.
5. Go to Settings > Application Manager > All and clear data/cache for Google Search and Google Services Framework by tapping on the function name and then clear data/cache related button.
6.Reboot your Galaxy S3
Source: Android central.
Showing posts with label how to. Show all posts
Sunday, September 16, 2012
Thursday, July 26, 2012
How to Setup Another Personal Email Account Aside From Gmail on Samsung Galaxy S3
You can also setup another personal email account on your Samsung Galaxy S3 via POP (Post Office Protocol) or IMAP (Internet Message Access Protocol) options. In these option you can send an email email using mobile data settings. But the downside of these option is that it only works when connected via WIFI and the phone deletes the account daily and it needs to be recreated. As different wifi connections have different SMTP server settings it makes sense to set up and use mobile data settings for sending emails however as wifi overrides mobile data you need to manually turn off wifi to send an email.
But if you want to setup an email account you can simply do it as follows:
- Tap on Apps
- Tap on the "Email" icon
- Tap on the box and type in your email address username and then the password
- Tap on Next
- Select server type which POP3 Outgoing Server Settings
- Ask from your email service provider and fill in the incoming email server settings and tap Next.
- Type in your email username on the box
- Fill in in your email's incoming email server. Select None for Security Type
- Type in your outgoing email server. Select None again for security type.
- Put a tick on the box that says "Require Sign In"
- Tap on Next.
- Select your desired time for Email check frequency for your phone to check and retrieve emails.
- Tick Sync Email and tick Notify me when email arrives.
- Type the display or sender name you want and then tap on Done
- Done
Sunday, July 22, 2012
How to Enable Auto Reject Call to Block Unwanted Callers number on your Samsung Galaxy S3
If you need to block unwanted calls on your Samsung Galaxy S3 you can simply set it by enabling the 'auto reject mode' via your phone's "call settings". This option lets you block an specific caller's number that will be blacklisted as incoming call to your phone number. Yeah, too nice isn't it! block someone you wouldn't mind to talk like your boyfriend if he breaks you up. This is also good for people who loves to play hide and seek. But don't ever block your wife, husband, mom, dad, family members or closest friends number or they might be worry about you when you're away.
To block a call from someone's number you can simply set it by doing this steps.
From the Home screen, Tap on "Menu"
Tap on "Settings"
Tap "Call Settings"
Then select "Call Rejection"
Enable the “Auto Reject Mode”
Select “Auto Reject List”.
Here you will have the following options:
Enter a caller's number: You can create a reject a call by entering a specific numbers
Choose from your contacts: Go into your contacts and choose a particular contact's numbers that you wish to reject or block.
Match criteria: you could also select Match criteria to further customize the automation, an option to search the number from log and can add to the block list.
Then Tap on "Save" your call rejection settings.
If you need to add more number to the rejection list, just repeat the above steps.
It displays as 'Unknown", you may then click the “Create” + button and type the number to add the numbers.You can also use the “Match Criteria” option to search the number from log and can add to the block list.
To block a call from someone's number you can simply set it by doing this steps.
From the Home screen, Tap on "Menu"
Tap on "Settings"
Tap "Call Settings"
Then select "Call Rejection"
Enable the “Auto Reject Mode”
Select “Auto Reject List”.Here you will have the following options:
Enter a caller's number: You can create a reject a call by entering a specific numbers
Choose from your contacts: Go into your contacts and choose a particular contact's numbers that you wish to reject or block.
Match criteria: you could also select Match criteria to further customize the automation, an option to search the number from log and can add to the block list.
Then Tap on "Save" your call rejection settings.
If you need to add more number to the rejection list, just repeat the above steps.
It displays as 'Unknown", you may then click the “Create” + button and type the number to add the numbers.You can also use the “Match Criteria” option to search the number from log and can add to the block list.
Wednesday, July 18, 2012
How to Set a Password on your Samsung Galaxy S3
If you need to have your Samsung Galaxy S3 like contacts, SMS, MMS, browsing history and etc. remains in private then you may needed to setup your own password unto it so that you are the only one can access the phone. On this guide we'll show you how to create or setup your own personal password directly to the phone.
To Set a Password on your Samsung Galaxy S3
* From the Home Screen> Tap on "Settings".
* Scroll down and then Tap “Security”,(then it opens up).
* Select “Security Lock” on that screen.
* Tap on “Password”.
* On the “Select Password Screen”. enter your desired unlock password and then press on the “Continue” button.
* Confirm your "password", enter the password again then tap the “OK” button.
More options for security lock
For quick lock mode without waiting time, just tick on the check box “Lock instantly with power key” within the “Security” screen.
For a little bit delayed in a few seconds before it gets locked, tick the check box “with swipe lock” ON. Do not tick “lock instantly with power button” checkbox and then select on “Lock automatically”.
You may then verify if your Password is working.
Enjoy!
To Set a Password on your Samsung Galaxy S3
* From the Home Screen> Tap on "Settings".
* Scroll down and then Tap “Security”,(then it opens up).
* Select “Security Lock” on that screen.
* Tap on “Password”.
* On the “Select Password Screen”. enter your desired unlock password and then press on the “Continue” button.
* Confirm your "password", enter the password again then tap the “OK” button.
More options for security lock
For quick lock mode without waiting time, just tick on the check box “Lock instantly with power key” within the “Security” screen.
For a little bit delayed in a few seconds before it gets locked, tick the check box “with swipe lock” ON. Do not tick “lock instantly with power button” checkbox and then select on “Lock automatically”.
You may then verify if your Password is working.
Enjoy!
Tuesday, July 17, 2012
How to Transfer Music Files from Computer to your Samsung Galaxy S3
If you need to transfer a music files from your computer into your Samsung Galaxy S3 there are several ways on how simply to do it. You can copy music files on these following formats - MP3, 3GA, AAC, M4A, and WMA music files. The below methods are just the simplest way I think.
Transfer Music files from Computer to Galaxy S3 as Removable Disk Drive
This is the most common methods on transferring music files directly from computer storage by connecting your Galaxy S3 to the computer using the USB cable.
A Galaxy S3 USB drivers is needed for Windows users and for Mac users not needed.
1) Connect your Galaxy S3 to your PC using the USB data cable.
2) Select Connected as media Device > Media device (MTP).
3. A removable disk will mount to your computer. You will see it listed under Computer if you’re a Windows user, or on the Desktop if you’re a Mac user.
4) Navigate the phone storage then locate the "Music folder".
(If you can't see any Music folder, create one and renamed as "Music".
5) Now simply copy or drag and drop all your favorite music to that music folder.
6) Once finished copying music files, safely removed the phone from PC connection.
Transfer Music files from Computer to Samsung Galaxy S3 using Samsung Kies software
First, you need to download Samsung Kies of you do not have installed it, and then you can transfer music files via USB or via WiFi wireless option.
1) Connect Samsung Galaxy S3 to your computer via USB.
2) Access the 'music' folder as shown on the hard drive.
3) Copy and paste all your favorite music to the Music Folder.
4) Once transferring music is done, safely removed you Galaxy S3 from the computer
So, that's it! You can now verify your copied Music files by playing it with your Galaxy S3 music player.
Transfer Music files from Computer to Galaxy S3 as Removable Disk Drive
This is the most common methods on transferring music files directly from computer storage by connecting your Galaxy S3 to the computer using the USB cable.
A Galaxy S3 USB drivers is needed for Windows users and for Mac users not needed.
1) Connect your Galaxy S3 to your PC using the USB data cable.
2) Select Connected as media Device > Media device (MTP).
3. A removable disk will mount to your computer. You will see it listed under Computer if you’re a Windows user, or on the Desktop if you’re a Mac user.
4) Navigate the phone storage then locate the "Music folder".
(If you can't see any Music folder, create one and renamed as "Music".
5) Now simply copy or drag and drop all your favorite music to that music folder.
6) Once finished copying music files, safely removed the phone from PC connection.
Transfer Music files from Computer to Samsung Galaxy S3 using Samsung Kies software
First, you need to download Samsung Kies of you do not have installed it, and then you can transfer music files via USB or via WiFi wireless option.
1) Connect Samsung Galaxy S3 to your computer via USB.
2) Access the 'music' folder as shown on the hard drive.
3) Copy and paste all your favorite music to the Music Folder.
4) Once transferring music is done, safely removed you Galaxy S3 from the computer
So, that's it! You can now verify your copied Music files by playing it with your Galaxy S3 music player.
Monday, July 16, 2012
How to Store Captured Photos and Videos on SD card on your Samsung Galaxy S3
The Samsung Galaxy S3 is the newest flagship of Samsung which is equipped
with on-board 8 megapixel HD camera that enables you to shoot splendid photos and videos. Now, if you wanted to save more space of your Galaxy S3 memory storage, you might wanna save your taken photos and videos to your external SD card.
The camera captured photos may consume around 5MB of disk space, but the videos will take up larger than 100MB so if you are a video and photo fanatics you'll probably struggling in saving your phone's internal memory usage. So, instead by storing all your photos and videos directly to your Galaxy S3 internal memory it is bit smarter to save it on your external SD card. Remember, the external micro SDcard is expandable up to 64GB, so that's a lot of files to store on it.
To save your Samsung Galaxy S3 photos and videos to your external SD card just simply follow this simple steps.
1) Ensure that you have installed a microSD card on your Galaxy S3.
2) Go to "CAMERA"
3) Tap the camera settings 'gear icon' in the bottom left, then scroll down.
4) In the given options simply select "SD card" to assign where your photos and videos to be saved.
That's it! Enjoy.
The camera captured photos may consume around 5MB of disk space, but the videos will take up larger than 100MB so if you are a video and photo fanatics you'll probably struggling in saving your phone's internal memory usage. So, instead by storing all your photos and videos directly to your Galaxy S3 internal memory it is bit smarter to save it on your external SD card. Remember, the external micro SDcard is expandable up to 64GB, so that's a lot of files to store on it.
To save your Samsung Galaxy S3 photos and videos to your external SD card just simply follow this simple steps.
1) Ensure that you have installed a microSD card on your Galaxy S3.
2) Go to "CAMERA"
3) Tap the camera settings 'gear icon' in the bottom left, then scroll down.
4) In the given options simply select "SD card" to assign where your photos and videos to be saved.
That's it! Enjoy.
Sunday, July 15, 2012
How to Connect Samsung Galaxy S3 to MAC PC using Android File Transfer
Some users of Samsung Galaxy S3 struggling to connect their devices to a PC running with MAC OSX. Using the Android File Transfer on Windows computer seems no issues but when it comes to Mac computers and Macbook pro laptops seems there is a problem with the connection.
Connecting Samsung Galaxy S3 to MAC PC using Android File Transfer issues:
Connecting Samsung Galaxy S3 to MAC PC using Android File Transfer Solution:
On your phone, when connected to the AFP program on your mac, you'll see a USB symbol in the notification area. Pull it down and you'll see it says something like 'Connected as media device' and it'll give you options underneath that to change it. Select that and you'll get to a settings page which will allow you to set your phone as a media device ((MTP) or as a camera (PTP) - do the latter and it should work fine.
I have to say, I love this phone but am not overly enamoured with the mac syncing aspect of it. Most apps in the store are flaky at best or don't work at all, TBH. Using the above method, I've managed to get my media over to the phone by dragging/dropping from iTunes and iPhoto.
Problem is, I still can't find a way for my computer to - reliably - see my phone as a camera when I plug it in e.g. invisible to iPhoto and Image capture.
I did actually. Turns out you have to check Camera (PTP) mode instead of Media device (MTP) mode.
Once I connected and checked PTP, the Android File Transfer now sees my phone
You don't need to be in debug mode either.
source: http://forum.xda-developers.com/showthread.php?t=1682041
Install UMS (USB Mass Storage) apps
Here's another solution if you're Samsung galaxy S3 can't connect to your Mac computer. This is an apps called UMS (USB Mass Storage) which enables your Samsung Galaxy S3 external microSD card accessible as a USB mass storage device.
http://forum.xda-developers.com/showthread.php?t=1711009
If you find a way around any other solution to this problem, please let us know.
Connecting Samsung Galaxy S3 to MAC PC using Android File Transfer issues:
So I got my SGS3 yesterday and noticed that the Android File Transfer app won't work, which used to work well when I owned a Galaxy Nexus. I tried it on 2 different Macs and it won't work on neither. The app does not recognize the phone being connected. When I connected it on windows (bootcamp, same Mac) it was recognized, so it's not a hardware fail, it's a software bug.
My Q is, has anybody successfully managed to use the Android File Transfer app together with a Galaxy S3.
Thx, all the help greatly appreciated.
It's definitely something with my Mac. I connected to my virtual Win7 machine on my Mac and it freaks out with the installing new software pop-up over and over but never connects.
Now it's gonna drive me crazy till I figure out what's going on with my Mac!
Hey guys, i'm having an issue with the file transfer. I can see both internal memory and SD, but when i tried to drag and drop from Finder it is giving me an error, saying my screen is locked (even when it isn't) and asking me to reconnect. anyone else have this problem? for now i'm transferring using File Explorer but its a pain in the ass. thanks!
I had this problem when I just got my Galaxy S3 at the end of May, and switching the connection mode to camera (ptp) did the trick. Now, however, regardless of the connection type I have chosen or whether or not I have enabled debugging, I cannot use AFT. At no point does it recognize my device, it just keeps telling me "No Android device found. Please connect your Android device with a USB cable to get started." I have reinstalled the program and still no luck.
MTP never worked for me on my Macbook, while PTP worked as a workaround until LFB (and later). With LFB changing to PTP (by default) pops up Image Capture, which, if everything worked as it should, is what you'd expect I suppose. The problem is that Image Capture doesn't find any pictures on the device even though it recognises that an I9300 is connected - and Android File Manager now doesn't work in either MTP or PTP mode.
Connecting Samsung Galaxy S3 to MAC PC using Android File Transfer Solution:
On your phone, when connected to the AFP program on your mac, you'll see a USB symbol in the notification area. Pull it down and you'll see it says something like 'Connected as media device' and it'll give you options underneath that to change it. Select that and you'll get to a settings page which will allow you to set your phone as a media device ((MTP) or as a camera (PTP) - do the latter and it should work fine.
I have to say, I love this phone but am not overly enamoured with the mac syncing aspect of it. Most apps in the store are flaky at best or don't work at all, TBH. Using the above method, I've managed to get my media over to the phone by dragging/dropping from iTunes and iPhoto.
Problem is, I still can't find a way for my computer to - reliably - see my phone as a camera when I plug it in e.g. invisible to iPhoto and Image capture.
I did actually. Turns out you have to check Camera (PTP) mode instead of Media device (MTP) mode.
Once I connected and checked PTP, the Android File Transfer now sees my phone
You don't need to be in debug mode either.
source: http://forum.xda-developers.com/showthread.php?t=1682041
Install UMS (USB Mass Storage) apps
Here's another solution if you're Samsung galaxy S3 can't connect to your Mac computer. This is an apps called UMS (USB Mass Storage) which enables your Samsung Galaxy S3 external microSD card accessible as a USB mass storage device.
http://forum.xda-developers.com/showthread.php?t=1711009
If you find a way around any other solution to this problem, please let us know.
How to Connect Samsung Galaxy S3 to smartTV using MHL to HDMI adapter
If you already bought a Samsung Galaxy S3 MHL to HDMI Adapter and want to connect your phone to a smartTV or any LED TV and LCD TV sets with HDMI input options you can do it as simple steps ahead.
The Samsung Galaxy S3 MHL to HDMI Adapter cable connects to the MicroUSB connection on the bottom of the Samsung Galaxy S3 and provides a HDMI port into which you can connect an HDMI cable which in turn connects to a HDMI TV screen. So, you can watch a film stored on the Galaxy S3,browse your photos or play it through your flat widescreen TV and keep the phone charged at the same time.
The Samsung Galaxy S3 comes with large internal memory or can even upgraded up to 64GB external SD card. So you can load more photos, videos, music on your Galaxy S3. This options lets stream your photos, watch movies (iTunes, NetFlix), videos, MTV, Podcast, on your HDTV via your Samsung Galaxy S3.
The Samsung Galaxy S3 HDMI adapter is portable and easy to use. This MHL to HDMI Adapter is one of the must have Samsung Galaxy S3 Accessories, So that you can turn your Galaxy S3 in a full-featured home entertainment and presentation system when coupled with an HDTV.
Here's the MHL to HDMI Adapter connection guide from Samsung Galaxy S3 and TV:
1. Connect your MHL Adapter on your Samsung Galaxy S3 micro USB port.
2. Connect the HDTV using the HDMI cable to the MHL Adapter
3. Connect the MHL Adapter external power supply (5V, 500mA), this is needed so that the Adapter will work and convert the MHL to HDMI signal from your Samsung Galaxy S3 to HDTV.
Once you connect the MHL Adapter you simply need to set your TV to HDMI input options and then also restart your Samsung Galaxy S3 after connecting your MHL adapter to TV.
The Samsung Galaxy S3 MHL to HDMI Adapter cable connects to the MicroUSB connection on the bottom of the Samsung Galaxy S3 and provides a HDMI port into which you can connect an HDMI cable which in turn connects to a HDMI TV screen. So, you can watch a film stored on the Galaxy S3,browse your photos or play it through your flat widescreen TV and keep the phone charged at the same time.
The Samsung Galaxy S3 comes with large internal memory or can even upgraded up to 64GB external SD card. So you can load more photos, videos, music on your Galaxy S3. This options lets stream your photos, watch movies (iTunes, NetFlix), videos, MTV, Podcast, on your HDTV via your Samsung Galaxy S3.
The Samsung Galaxy S3 HDMI adapter is portable and easy to use. This MHL to HDMI Adapter is one of the must have Samsung Galaxy S3 Accessories, So that you can turn your Galaxy S3 in a full-featured home entertainment and presentation system when coupled with an HDTV.
Here's the MHL to HDMI Adapter connection guide from Samsung Galaxy S3 and TV:
1. Connect your MHL Adapter on your Samsung Galaxy S3 micro USB port.
2. Connect the HDTV using the HDMI cable to the MHL Adapter
3. Connect the MHL Adapter external power supply (5V, 500mA), this is needed so that the Adapter will work and convert the MHL to HDMI signal from your Samsung Galaxy S3 to HDTV.
Once you connect the MHL Adapter you simply need to set your TV to HDMI input options and then also restart your Samsung Galaxy S3 after connecting your MHL adapter to TV.
Saturday, July 7, 2012
How to format a 32GB/64GB Micro SDHC/SDXC card on Samsung Galaxy S3
If you have just bought a new MicroSd card on your Samsung Galaxy S3 you need to format it first before you can continue to use the card to store files such as apps, music, videos and anything on it.
When you ordered a Samsung Galaxy S3 its already have a preloaded 32gb class 10 additional microSd card, an external memory on the phone. Some users prepared additional space so that they can store more files since Samsung Galaxy S3 is upgradeable up to 64gb extenal microSD memory card.
So, it needs to be formatted first when you put it into your Galaxy S3 before you can store anything to it, just make sure that you have purchased a compatible card that exactly works on Samsung Galaxy S3.
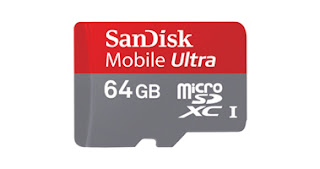
When my newly purchased 64gb micro SDXC card - mine is Sandisk Mobile Ultra, I first formatted it to exFAT file system. A 64GB micro SDXC cards works basically on every Android device that can read up to that capacity but they generally only work when formatted to Fat32 rather than the SDXC standards native exFAT formatting system (several devices on ICS work with them formatted NTFS now also, but as a general rule Fat32 is the only option). The problem here is that when you use of these cards Fat32 formatted you impose a 4GB file size limit on them, which can be hassle for transferring HD video to your device, and even worse you curtail the stellar read and write speeds available in the SDXC standard. I for one can't wait to format my 64GB card to exFAT for unrestricted use in my S III.
You can grab the SDXC formatter with exFAT support at https://www.sdcard.org/downloads/formatter_3/
This guide shows how to format the microSD card once you firstly mount the external sdcard on your Samsung Galaxy S3 phone's memory card tray.
1. Press the 'Home Menu'.
2. Choose 'Settings'.
3. Scroll down to the bottom> Tap 'Storage'.
4. scroll down to the bottom> Tap 'SD card'
5. Tap 'Mount SD card'
6. Tap 'Format SD card'
7. You'll be then prompted with a message
Data cannot be recoverred after SD card is cleared. Continue?
8. Just Tap 'Format SD Card' button
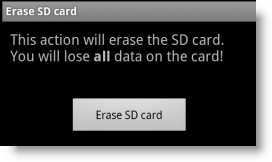
9. Finally Tap on 'Erase SD Card' button to start the erase process.

10. That's it!
You will then see a total available space of your newly formatted SD card. You can now add or store more files as you want on your Samsung Galaxy S3 externalSD card.
When you ordered a Samsung Galaxy S3 its already have a preloaded 32gb class 10 additional microSd card, an external memory on the phone. Some users prepared additional space so that they can store more files since Samsung Galaxy S3 is upgradeable up to 64gb extenal microSD memory card.
So, it needs to be formatted first when you put it into your Galaxy S3 before you can store anything to it, just make sure that you have purchased a compatible card that exactly works on Samsung Galaxy S3.
You can grab the SDXC formatter with exFAT support at https://www.sdcard.org/downloads/formatter_3/
This guide shows how to format the microSD card once you firstly mount the external sdcard on your Samsung Galaxy S3 phone's memory card tray.
1. Press the 'Home Menu'.
2. Choose 'Settings'.
3. Scroll down to the bottom> Tap 'Storage'.
4. scroll down to the bottom> Tap 'SD card'
5. Tap 'Mount SD card'
6. Tap 'Format SD card'
7. You'll be then prompted with a message
Data cannot be recoverred after SD card is cleared. Continue?
8. Just Tap 'Format SD Card' button
9. Finally Tap on 'Erase SD Card' button to start the erase process.

10. That's it!
You will then see a total available space of your newly formatted SD card. You can now add or store more files as you want on your Samsung Galaxy S3 externalSD card.
Update: Prior to the new firmware releases by Samsung, this process will no longer works.. Please read martin phillips posts below instead.
It would appear that the recent firmware upgrade withdrew support for the exFAT file system. Reading around, lots of people have reported problems with exFAT on the S3 (see the http://forum.xda-developers.com wesite). It was from this site that I got the solution....
FAT32 is the way to go (yeah it's got a 4Gb individual file limit, but I'd rather have 64Gb of storage than a 'dead' card). As I reported above, the Windows 7 command line tool will not format a 64Gb card to FAT32. The solution from the xda site above is to use this tool: http://www.ridgecrop.demon.co.uk/index.htm?guiformat.html
(click on the screenshot to download, not the 'Download' link)
All I have to do now is put all my data back on the card!!!
Friday, July 6, 2012
How to Factory Reset your Samsung Galaxy S3 Wipe Data and Restore to Original Settings
If you wanted to Factory reset your Samsung Galaxy S3 or return it back to its original factory default settings. You can simply do it in these three easy ways. This method is only advisable on some part for it will wipe some data stored from your Galaxy S3 phone's internal memory and cannot be taken slightly. But performing A factory reset is also useful to fix some issues that you might encountered with your phone like, frozen or severe hang problems due to excessive applications that you might have installed on your device.
Important: Just ensure that you make a back -up copy of all your important files stored from your Galaxy S3. You can use google sync and Kies to sync or back up all of your files, like contacts, messages, photos, videos, music, apps and etc.
3 Ways on how to perform factory reset on your Samsung Galaxy S3
Activate Factory data reset via your Galaxy S3 settings
Tap on Settings.
Tap on Privacy.
Tap on Factory data reset.
Then choose Reset phone.
Finally, confirm your decision > Tap on Erase everything.
Using a code on a dialpad to factory reset your Galaxy S3
On your keypad just type this code: *2767*3855#
Once the code entered, your Galaxy S3 will then reboot and it will restore to its original factory settings like the way you first bought it.
Factory data reset by using your Galaxy S3 buttons
This is another much more deeper techniques, by using the three button combination of your Galaxy S3 you can quickly do a factory reset in no time.
To do this:
First Turn off your Samsung Galaxy S3 Phone or you can either Remove the battery, in couple of seconds then place it back again.
Now while the phone is completely shut down.
Gently Press and hold down Volume Up + Home + Power buttons at the same time.
You will be taken to recovery mode screen.

This area is the Android system recovery will you can perform some service modes.
Now, just simply select wipe data/factory reset.
You may use the Volume control keys make a selection and then the Home button to select.
Next select Yes — to delete all user data.
Then finally, select reboot system now.
That's it! Wait until the phone completely reboots. Once its finishes rebooting, you'll will noticed that it now returns to its original factory default settings just like when you freshly bought it.
Important: Just ensure that you make a back -up copy of all your important files stored from your Galaxy S3. You can use google sync and Kies to sync or back up all of your files, like contacts, messages, photos, videos, music, apps and etc.
3 Ways on how to perform factory reset on your Samsung Galaxy S3
Activate Factory data reset via your Galaxy S3 settings
Tap on Settings.
Tap on Privacy.
Tap on Factory data reset.
Then choose Reset phone.
Finally, confirm your decision > Tap on Erase everything.
Using a code on a dialpad to factory reset your Galaxy S3
On your keypad just type this code: *2767*3855#
Once the code entered, your Galaxy S3 will then reboot and it will restore to its original factory settings like the way you first bought it.
Factory data reset by using your Galaxy S3 buttons
This is another much more deeper techniques, by using the three button combination of your Galaxy S3 you can quickly do a factory reset in no time.
To do this:
First Turn off your Samsung Galaxy S3 Phone or you can either Remove the battery, in couple of seconds then place it back again.
Now while the phone is completely shut down.
Gently Press and hold down Volume Up + Home + Power buttons at the same time.
You will be taken to recovery mode screen.

This area is the Android system recovery will you can perform some service modes.
Now, just simply select wipe data/factory reset.
You may use the Volume control keys make a selection and then the Home button to select.
Next select Yes — to delete all user data.
Then finally, select reboot system now.
That's it! Wait until the phone completely reboots. Once its finishes rebooting, you'll will noticed that it now returns to its original factory default settings just like when you freshly bought it.
Wednesday, July 4, 2012
How to Adjust the Display Brightness on your Samsung Galaxy S3
Your Samsung Galaxy S3 display brightness is already set to a default level that may look good, but not everyone's users eyes can find it more refreshing. Just like if your're indoors or in outdoors the screen brightness may differ from its environment, you may probably want to adjust the brightness away litle bit lower or higher level to suites your eyes visibility.
You can easily change it by going to Settings > Display > Brightness and adjusting the slider until it's set to an acceptable level.
You may also want to take advantage of the 'Automatic brightness' option so that your Galaxy S3 will automatically become brighter when you're out in shade of the sunlight or dimmer when you're at home or under the moonlight.
Adjusting display brightness of the Samsung Galaxy S3
1) Tap "Menu"
2) Tap "Settings"
3) Tap "Display"
4) Adjust your desired screen brightness level or set to "Automatic"
In addition, some users suggestion if the display brightness way set to high will consume a lot of battery power, like if your constantly checking Facebook and Twitter throughout the day.
When it comes to save your battery life, setting the display brightness at low is a way better and last much longer before it drains.
You can easily change it by going to Settings > Display > Brightness and adjusting the slider until it's set to an acceptable level.
You may also want to take advantage of the 'Automatic brightness' option so that your Galaxy S3 will automatically become brighter when you're out in shade of the sunlight or dimmer when you're at home or under the moonlight.
Adjusting display brightness of the Samsung Galaxy S3
1) Tap "Menu"
2) Tap "Settings"
3) Tap "Display"
4) Adjust your desired screen brightness level or set to "Automatic"
In addition, some users suggestion if the display brightness way set to high will consume a lot of battery power, like if your constantly checking Facebook and Twitter throughout the day.
When it comes to save your battery life, setting the display brightness at low is a way better and last much longer before it drains.
Thursday, June 28, 2012
How to set Samsung Galaxy S3 a MP3 music as an email or text messages notifications ringtone
If you would like to set your own favorite music MP3 as a custom notification ringtone on your Samsung Galaxy S3 SIII i9300 for any text messages or twitter, facebook, gmail received emails as well as any other notification that requires a ringtone. This tips will show you some simple steps ahead on how to set that favorite music of yours and used it as your default Text or Email messages ringtone.
At first you need to have some good quality MP3 music files that are loaded into your pre-formatted external micro SDcard of your Samsung Galaxy S3. If you don't know where to put or copy the music to your microSD card. Follow this guide:
* Insert the micro SD card to your PC or laptop SD card slot or card reader.
* Once its connected, open its content and locate the folder named 'Sounds" then copy and paste all of your favorite music MP3 tracks or album on that specific folder.
After you have already loaded the music files unto your extenal microSD card, you need to copy or move that music file from the external SD card to your phones internal memory. But first you must create a new folder named "Notifications" to your phones media files in order for this to work.
To do this follow this steps:
step 1
* Go to Apps > General File Browser
* Tap on 'My Files' folder
step 2
Once you're in here there two folders options you can choose the extSD Card and the sdcard.
Just select the 'sd card' folder which is the internal memory of the phone and not the extSD card which is the external memory card of the phone.
step 3
When your in SDcard option, scroll down and then
* Tap on a "Media" folder. You should see a folder named audio.
Now what you need to do in here is create folder and named it as "Notifications".
* Hit on "Menu" button
* Tap on "Create folder"
* Then type the name of the folder as "Notifications"
* then hit "OK" button.
step 4
Once the new "Notifications" folder already created.
* Tap on it, then you find its empty. It should be on a file folder like this /mnt/sdcard/media/notifications
* Now all you have to do next is copy a song or music track with MP3 format from your external SDcard or exSD card.
step 5
Go back to home screen menu then
Go to Apps > General File Browser
* Tap on 'My Files' folder
* This time tap on "extSd card" folder - your external Sd card.
* Once in there, locate the music mp3 files where you have stored.
step 6
Once you have chosen a music file.
Hold down that music track, then tap on a pop-up option where it says "copy"
Then it will prompt you where you want to copy that music track.
* Just simply select " SDcard" and navigate to "Media" then to the "Notifications" folder you have just created.
* Then tap on option "Copy" on top of the browser.
step 7
Now adding the Music MP3 track as a Text messages Ringtone
* Goto "settings"
* Tap on "Sound"
* Tap on "Default Notifications"
* Just simply find and select the Music file that you have just copied and tap "OK" button.
Now that you have set it a certain music of your choice as a deafult notification ringtone, you can then try it by sending a text message on your Samsung Galaxy S3.
At first you need to have some good quality MP3 music files that are loaded into your pre-formatted external micro SDcard of your Samsung Galaxy S3. If you don't know where to put or copy the music to your microSD card. Follow this guide:
* Insert the micro SD card to your PC or laptop SD card slot or card reader.
* Once its connected, open its content and locate the folder named 'Sounds" then copy and paste all of your favorite music MP3 tracks or album on that specific folder.
After you have already loaded the music files unto your extenal microSD card, you need to copy or move that music file from the external SD card to your phones internal memory. But first you must create a new folder named "Notifications" to your phones media files in order for this to work.
To do this follow this steps:
step 1
* Go to Apps > General File Browser
* Tap on 'My Files' folder
step 2
Once you're in here there two folders options you can choose the extSD Card and the sdcard.
Just select the 'sd card' folder which is the internal memory of the phone and not the extSD card which is the external memory card of the phone.
step 3
When your in SDcard option, scroll down and then
* Tap on a "Media" folder. You should see a folder named audio.
Now what you need to do in here is create folder and named it as "Notifications".
* Hit on "Menu" button
* Tap on "Create folder"
* Then type the name of the folder as "Notifications"
* then hit "OK" button.
step 4
Once the new "Notifications" folder already created.
* Tap on it, then you find its empty. It should be on a file folder like this /mnt/sdcard/media/notifications
* Now all you have to do next is copy a song or music track with MP3 format from your external SDcard or exSD card.
step 5
Go back to home screen menu then
Go to Apps > General File Browser
* Tap on 'My Files' folder
* This time tap on "extSd card" folder - your external Sd card.
* Once in there, locate the music mp3 files where you have stored.
step 6
Once you have chosen a music file.
Hold down that music track, then tap on a pop-up option where it says "copy"
Then it will prompt you where you want to copy that music track.
* Just simply select " SDcard" and navigate to "Media" then to the "Notifications" folder you have just created.
* Then tap on option "Copy" on top of the browser.
step 7
Now adding the Music MP3 track as a Text messages Ringtone
* Goto "settings"
* Tap on "Sound"
* Tap on "Default Notifications"
* Just simply find and select the Music file that you have just copied and tap "OK" button.
Now that you have set it a certain music of your choice as a deafult notification ringtone, you can then try it by sending a text message on your Samsung Galaxy S3.
Wednesday, June 27, 2012
How to Change the Lockscreen Shortcut Icons on your Samsung Galaxy S3
These are instructions on how to change and customize your Samsung Galaxy S3 Lockscreen to display your calendar, mail, calls, sms, weather, twitter, facebook, todo, apps and more. On the Samsung Galaxy S III you can change the content on your lock screen of your own choice.
Change your Samsung Galaxy S3 Lockscreen Shortcuts:
This option will allow you to make shortcuts to the features or apps that you use the most. Turn them on and off by swiping the button next to where is reads Shortcuts. You can change the shortcuts on the lockscreen by pressing down on your screen where it says Shortcuts, when you do this you will be taken to a different screen where you can remove and add new shortcuts simply by pressing the icon you want to get rid of and dragging it into the thrash can that appears at the bottom of the screen.
Customizing the Lock Screen Settings - including shortcuts icons
1) Tap "Menu"
2) Tap "Settings"
3) Tap "Security"
4) Tap "Lock Screen Options"
5) Tap "Shortcuts", it will take to "Set shortcuts"options menu.
Then you can set or add any icons as you like. Just tap the “+” symbol to get up the list of available new shortcuts to choose from.
That's it! you change the lockscreen shortcuts icons on your Samsung Galaxy S3 as often as you like.
Change your Samsung Galaxy S3 Lockscreen Shortcuts:
This option will allow you to make shortcuts to the features or apps that you use the most. Turn them on and off by swiping the button next to where is reads Shortcuts. You can change the shortcuts on the lockscreen by pressing down on your screen where it says Shortcuts, when you do this you will be taken to a different screen where you can remove and add new shortcuts simply by pressing the icon you want to get rid of and dragging it into the thrash can that appears at the bottom of the screen.
Customizing the Lock Screen Settings - including shortcuts icons
1) Tap "Menu"
2) Tap "Settings"
3) Tap "Security"
4) Tap "Lock Screen Options"
5) Tap "Shortcuts", it will take to "Set shortcuts"options menu.
Then you can set or add any icons as you like. Just tap the “+” symbol to get up the list of available new shortcuts to choose from.
That's it! you change the lockscreen shortcuts icons on your Samsung Galaxy S3 as often as you like.
How To turn on Battery Percentage Meter on your Samsung Galaxy S3
Aside from the graphical representation of a battery life of your Samsung Galaxy S3, you may also want to see the remaining juice of your Galaxy S3 represented in percentage points. I prefer this over the default battery information, because you get a more accurate reading.
So, instead of just guessing how much battery life is really left on your Samsung Galaxy S3, you can turn on the percentage indicator. Luckily this capability comes built-in and you can quickly enable it on your phone.
To turn on Battery Percentage % meter on your Galaxy S3, follow these steps.
To turn on Battery Percentage Indicator
* Tap "Menu"
* Tap "Settings"
* Tap "Display"
* Turn on the toggle for “Display battery percentage”
That's it and you’re done! Click the home button and now you’ll see the remaining percentage of battery life in the top notification bar.
So, instead of just guessing how much battery life is really left on your Samsung Galaxy S3, you can turn on the percentage indicator. Luckily this capability comes built-in and you can quickly enable it on your phone.
To turn on Battery Percentage % meter on your Galaxy S3, follow these steps.
To turn on Battery Percentage Indicator
* Tap "Menu"
* Tap "Settings"
* Tap "Display"
* Turn on the toggle for “Display battery percentage”
That's it and you’re done! Click the home button and now you’ll see the remaining percentage of battery life in the top notification bar.
Tuesday, June 26, 2012
How to Activate Motion recognition features such as Direct call and Smart alert on Samsung Galaxy S3
The Samsung Galaxy S3 not only amazing of its features such as Camera 8+ MP, Super HD AMOLED touchscreen , Quad core processor, Android 4.0 Ice Cream Sandwich, Voice , Recognition and Eye Movement Recognition but also features a Direct call and Smart alert for extra practicality.
A Direct call uses a proximity sensors and motion recognition that automatically identify when you bring the phone to your ear. It will just then ring the contact whose details you have on screen or are currently texting.
Smart alert is a feature that knows when you return to your phone after, say, a making a coffee when you left your S III on the sofa. Pick it up and it gives you a brief vibrating nudge to inform you about missed calls and new messages. How thoughtful is that?
The Samsung Galaxy S III is a social phone, letting you talk to it like a friend. It recognises when you’re looking at it, when you return to it, recognises your friends in photos, and it’s super high powered for all the apps and multitasking you need.
You can activate or enable Direct call and Smart alert recognition option by this simple hints.
1) Press Menu
2) Press Settings
3) Press Motion
4) Then simply tick the box next to Direct Call.
Press the toggle on the features you wish to use like Smart alert.
A Direct call uses a proximity sensors and motion recognition that automatically identify when you bring the phone to your ear. It will just then ring the contact whose details you have on screen or are currently texting.
Smart alert is a feature that knows when you return to your phone after, say, a making a coffee when you left your S III on the sofa. Pick it up and it gives you a brief vibrating nudge to inform you about missed calls and new messages. How thoughtful is that?
The Samsung Galaxy S III is a social phone, letting you talk to it like a friend. It recognises when you’re looking at it, when you return to it, recognises your friends in photos, and it’s super high powered for all the apps and multitasking you need.
You can activate or enable Direct call and Smart alert recognition option by this simple hints.
1) Press Menu
2) Press Settings
3) Press Motion
4) Then simply tick the box next to Direct Call.
Press the toggle on the features you wish to use like Smart alert.
How to Connect Samsung Galaxy S3 to TV via WiFi
Here's how you can connect your Samsung Galaxy S3 to TV.
If you want to watch a streaming photos and videos on your large screen TV from your Samsung Galaxy S3 is very awesome. There are two methods on how you can enable it by using two main accessories introduced by Samsung.
Connect Samsung Galaxy S3 to TV using AllShare Cast Dongle via Wi-Fi
The Samsung AllShare Cast Dongle can be connected to your HDTV to enable the streaming of content from your Samsung Galaxy S3. The dongle plugs into an HDMI port on your TV set and photos and videos can then be streamed to the TV via Wi-Fi.
If you're looking to pair up a brand new Galaxy S III with a bigger screen, but you're not yet part of the Smart TV generation, then this little accessory could get you out of a fix. It's palm-sized with a single blue LED light indicating a connection, but honestly you don't ever need to look at it: it doesn't need line-of-sight to your handset because it uses a wireless protocol called WiFi Display, which means you can happily leave it dangling out of the way behind your TV. The unit has two cables: one for power and the other for the HDMI connection to your TV, which can transmit up to 1080p video and audio. As you'll see in the hands-on video after the break, it works for direct mirroring, so you can watch movies, play games or reel off holiday slideshows. But it also has a more enterprise-focused feature, in the form of a slideshow function in cahoots with the Polaris Office app, which means you can use your GS III as a controller for a presentation. It's a simple idea, but it all seemed to work smoothly and we can imagine it coming in pretty handy.
Connect Samsung Galaxy S3 to TV using HDMI adapter
This official MHL adaptor for the Samsung Galaxy S3 allows you to create an HDMI output via your handset's microUSB connection.
This cable connects to the MicroUSB connection on the bottom of the Samsung Galaxy S3 and provides a HDMI port into which you can connect an HDMI cable which in turn connects to a HDMI screen.
You can too connect a microUSB mains power cable to the device at the same time as the MHL HDTV adapter has a microUSB port on it to accept power. So, you can watch a film stored on the Galaxy S3, play it through your 42" HDTV and keep the phone charged at the same time.
If you already have a device such as a Samsung Galaxy S II or Nexus that has MHL/video out through the microUSB port then be aware, if you own the accessory that allows you to connect it to a HD display, IT WILL NOT WORK with the Galaxy S III.
The Galaxy S3 has a different pin connection so you need a different adapter, which you can buy.
It works in exactly the same way but has the correct pin connections so your S3 display will be shown on a HD monitor or TV. If you too have an MHL enabled monitor like the one we demonstrated here, you will too need this accessory as the current microUSB MHL cables do not support the S3, it is hardware related rather than software. Here's a guide for the MHL to HDMI connection to your Smart TV sets.
sources: clove.co.uk | androidauthority | engadget
If you want to watch a streaming photos and videos on your large screen TV from your Samsung Galaxy S3 is very awesome. There are two methods on how you can enable it by using two main accessories introduced by Samsung.
Connect Samsung Galaxy S3 to TV using AllShare Cast Dongle via Wi-Fi
The Samsung AllShare Cast Dongle can be connected to your HDTV to enable the streaming of content from your Samsung Galaxy S3. The dongle plugs into an HDMI port on your TV set and photos and videos can then be streamed to the TV via Wi-Fi.
If you're looking to pair up a brand new Galaxy S III with a bigger screen, but you're not yet part of the Smart TV generation, then this little accessory could get you out of a fix. It's palm-sized with a single blue LED light indicating a connection, but honestly you don't ever need to look at it: it doesn't need line-of-sight to your handset because it uses a wireless protocol called WiFi Display, which means you can happily leave it dangling out of the way behind your TV. The unit has two cables: one for power and the other for the HDMI connection to your TV, which can transmit up to 1080p video and audio. As you'll see in the hands-on video after the break, it works for direct mirroring, so you can watch movies, play games or reel off holiday slideshows. But it also has a more enterprise-focused feature, in the form of a slideshow function in cahoots with the Polaris Office app, which means you can use your GS III as a controller for a presentation. It's a simple idea, but it all seemed to work smoothly and we can imagine it coming in pretty handy.
Connect Samsung Galaxy S3 to TV using HDMI adapter
This official MHL adaptor for the Samsung Galaxy S3 allows you to create an HDMI output via your handset's microUSB connection.
This cable connects to the MicroUSB connection on the bottom of the Samsung Galaxy S3 and provides a HDMI port into which you can connect an HDMI cable which in turn connects to a HDMI screen.
You can too connect a microUSB mains power cable to the device at the same time as the MHL HDTV adapter has a microUSB port on it to accept power. So, you can watch a film stored on the Galaxy S3, play it through your 42" HDTV and keep the phone charged at the same time.
If you already have a device such as a Samsung Galaxy S II or Nexus that has MHL/video out through the microUSB port then be aware, if you own the accessory that allows you to connect it to a HD display, IT WILL NOT WORK with the Galaxy S III.
The Galaxy S3 has a different pin connection so you need a different adapter, which you can buy.
It works in exactly the same way but has the correct pin connections so your S3 display will be shown on a HD monitor or TV. If you too have an MHL enabled monitor like the one we demonstrated here, you will too need this accessory as the current microUSB MHL cables do not support the S3, it is hardware related rather than software. Here's a guide for the MHL to HDMI connection to your Smart TV sets.
sources: clove.co.uk | androidauthority | engadget
How to Connect Samsung Galaxy S3 to Computer (Windows & Mac OS)
It is the third generation successor to Samsung's previous flagship phones, the Samsung Galaxy S II. It has an HD (720 x 1280 pixels, 4.8 inches) Super AMOLED capacitive touchscreen display with Corning Gorilla Glass 2, an improved camera system, and Google's new version of its Android operating system, Android OS, v4.0.4 , codenamed Ice Cream Sandwich. If you have a Samsung Galaxy S3 in hand, you probably have good experience on it. This guide will show you some tips on how to connect the Galaxy S III to PC for transferring music, picture, video files to Galaxy S III.
The Samsung Galaxy S III uses two Media device mode the (MTP) and Camera (PTP) mode only.
Guide: How to Connect Samsung Galaxy S3 to to PC with Windows OS via USB.
1. Use a USB cable to connect your Samsung Galaxy S3 to a Windows computer.
2. This connection uses the MTP protocol, which is supported by most recent versions of Windows.
3. When you connect your Samsung Galaxy S3 to the USB port on your Windows computer, its USB storage is mounted as a drive and appears on your computer screen.
4. Now you can copy music, picture, video files to Samsung Galaxy S3 from windows PC as you using any other external device.
5. When you’re finished, simply disconnect the Samsung Galaxy S3 by unplugging the USB cable.
Note: If you are using USB tethering, you must turn that off before you can use USB to transfer files between your Samsung Galaxy S3 phone and Windows computer.
Guide: How to Connect Samsung Galaxy S3 to to PC with MAC OS via USB.
This connection uses the MTP protocol, which is not supported by Mac OS X natively. Therefore, you first need to install the free Android File Transfer application on your Macintosh. It’s available from www.android.com/filetransfer, along with instructions on how to install it. After you install Android File Transfer, follow these steps:
1. If you are using Android File Transfer for the first time, double-click it to open it.
2. After you start Android File Transfer once, it opens automatically whenever you connect your device to your computer.
3. Connect your device to your computer with a USB cable.
4. Android File Transfer starts, if it’s not already running, and opens a window that displays the contents of your device, along with storage space details at the bottom of the window.
5. If it were a Finder window: opening and closing folders, creating new folders, and dragging music, picture, video files to Samsung Galaxy S3 from Mac PC. Disconnect the USB cable when you're finished.
Update: Seems this ain't work anymore with the latest firmware updates on Galaxy S3. Both companies doesn't like each other, and users get affected by their bloody war. I tried transferring files using bluetooth but it keeps sending failed, then again I tried sending files via e-mail, it works but heck that was not a fix solution. Some fixes i found out is to use a free 3rd party application from Google play store. I used a free file manager application, hope you could find out any best solution for this issue too.
Guide: How to connect Samsung Galaxy S3 to PC wirelessly via WiFi (Windows and Mac OSX)
Samsung has also added a convenience to Galaxy S3 users, such features is that you can also connect your Galaxy S3 device to PC wirelessly, and sync your content, via Wi-Fi. Buit some functionality is limited when device connected to Kies via Wi-Fi compared to connection via USB. All you need to have is Samsung Kies installed on your PC or laptop. This will work both on computers with Windows and Mac OS, just download and install Samsung Kies according to your computer's operating system.
The Samsung Galaxy S III uses two Media device mode the (MTP) and Camera (PTP) mode only.
Guide: How to Connect Samsung Galaxy S3 to to PC with Windows OS via USB.
1. Use a USB cable to connect your Samsung Galaxy S3 to a Windows computer.
2. This connection uses the MTP protocol, which is supported by most recent versions of Windows.
3. When you connect your Samsung Galaxy S3 to the USB port on your Windows computer, its USB storage is mounted as a drive and appears on your computer screen.
4. Now you can copy music, picture, video files to Samsung Galaxy S3 from windows PC as you using any other external device.
5. When you’re finished, simply disconnect the Samsung Galaxy S3 by unplugging the USB cable.
Note: If you are using USB tethering, you must turn that off before you can use USB to transfer files between your Samsung Galaxy S3 phone and Windows computer.
Guide: How to Connect Samsung Galaxy S3 to to PC with MAC OS via USB.
This connection uses the MTP protocol, which is not supported by Mac OS X natively. Therefore, you first need to install the free Android File Transfer application on your Macintosh. It’s available from www.android.com/filetransfer, along with instructions on how to install it. After you install Android File Transfer, follow these steps:
1. If you are using Android File Transfer for the first time, double-click it to open it.
2. After you start Android File Transfer once, it opens automatically whenever you connect your device to your computer.
3. Connect your device to your computer with a USB cable.
4. Android File Transfer starts, if it’s not already running, and opens a window that displays the contents of your device, along with storage space details at the bottom of the window.
5. If it were a Finder window: opening and closing folders, creating new folders, and dragging music, picture, video files to Samsung Galaxy S3 from Mac PC. Disconnect the USB cable when you're finished.
Update: Seems this ain't work anymore with the latest firmware updates on Galaxy S3. Both companies doesn't like each other, and users get affected by their bloody war. I tried transferring files using bluetooth but it keeps sending failed, then again I tried sending files via e-mail, it works but heck that was not a fix solution. Some fixes i found out is to use a free 3rd party application from Google play store. I used a free file manager application, hope you could find out any best solution for this issue too.
Guide: How to connect Samsung Galaxy S3 to PC wirelessly via WiFi (Windows and Mac OSX)
Samsung has also added a convenience to Galaxy S3 users, such features is that you can also connect your Galaxy S3 device to PC wirelessly, and sync your content, via Wi-Fi. Buit some functionality is limited when device connected to Kies via Wi-Fi compared to connection via USB. All you need to have is Samsung Kies installed on your PC or laptop. This will work both on computers with Windows and Mac OS, just download and install Samsung Kies according to your computer's operating system.
Monday, June 25, 2012
How to Update Samsung Galaxy S3 Software using Kies
If you want to enjoy more out of your Samsung Galaxy S3, you need to keep it updated to its latest software updates on Kies. Samsung Kies is a tool from Samsung that lets your mobile phone get any latest sotware available software upgrades that will add enhancements like extra speed, improved functionality and fixed for any bug issues.
To update your Galaxy S III thru Kies you only need to download it from Samsung Kies.
Kies 2.0
You must ensure these things first before you may upgrade to avoid failure issues.
Step 1:
Once, you already downloaded Kies, Install and run it in your computer
Step 2:
The connect your mobile phone to your PC using USB cable
Step 3:
Just follow the onscreen instruction on Kies window. Kies will guide you through the installation process
That's It! You can now update your Samsung Galaxy S3 to any latest software updates available from Kies.
source: Samsung UK
To update your Galaxy S III thru Kies you only need to download it from Samsung Kies.
Kies 2.0
You must ensure these things first before you may upgrade to avoid failure issues.
- Make sure galaxy S3 battery is fully charge.
- Ensure that you have a good internet connection
- Kies will run on computer with Mac and Windows OS
- Use the supplied USB date cable with the Galaxy S3
Step 1:
Once, you already downloaded Kies, Install and run it in your computer
Step 2:
The connect your mobile phone to your PC using USB cable
Step 3:
Just follow the onscreen instruction on Kies window. Kies will guide you through the installation process
That's It! You can now update your Samsung Galaxy S3 to any latest software updates available from Kies.
source: Samsung UK
Sunday, June 24, 2012
How to capture screen on Samsung Galaxy S3 - save screenshots
So do you want to capture the displayed screen on Samsung Galaxy S3 phone? Just follow this simple steps on how do exactly take and capture the screenshots from your phone and then saved it or share it to your friends over the internet via email or social networks like facebook, pinterest and etc.
The Samsung Galaxy S3 already have a built in capability to take and saved screenshots directly from the phone. So, you don't really need to root your device or install any application just to make a screenshots
There are two methods you can actually make a screenshots on your Samsung Galaxy S3. Just try the two different methods below that might work for you.
Method 1:
1. HOLD down the POWER button and the HOME button simulatneosly.
2. You’ll then see a message appear on the screen that says “screenshot saved to Camera shots”. With this method, your screenshot will appear in the directory /Pictures/Screenshots. You can also go to your Gallery app to see the screenshots that you have captured.
If this method didn’t work for you? – Try on to the method 2, its the most clever thing I have encountered on my Galaxy S3 and it should really make it work.
Method 2:
1. Click the MENU button and select SETTINGS.
2. Select MOTION.
3. Under “Hand Motion” settings, check “Palm swipe to Capture” checkbox.
4. Now you can capture screens by moving your palm on the screen from left to right or right to left.
The taken screenshots will then saved to your Gallery app to see the screenshots that you have captured.
That's it! Enjoy taking screenshoots on your Samsung galaxy S3.
Saturday, June 23, 2012
How to Insert New SIM Card on Samsung Galaxy S3
Okay you got a new Samsung galaxy S3 in hand, so where to start? Mostly first timer will insert a new SIM card to the phone. If it is your first time to open up your Samsung Galaxy S3 and wonder how to insert a micro SIM card unto it, here's how simply to do it.
You need a micro SIM card to start with, the phone shop will provide you I working SIM card but then you can also switch it over to another mobile network provider if your Galaxy S3 is unlock or unbranded version.
1. You may firstly removed the back cover by gently hold at the top and bottom edges and slit it upward.
2. If the battery if already inserted to it, just simply remove it by lifting at the top left.
3. Now, when the battery is removed, slit the Micro SIM into the SIM tray facing to the correct direction.
4. Put back the battery once the SIM card is already installed.
5. Then gently replace back the back cover by smoothly applying pressure along the edges
That's it! you have now your Samsung Galaxy S3 inserted with a new SIM card.
You may also visit Vodafone UK youtube channel for the video guide.
You need a micro SIM card to start with, the phone shop will provide you I working SIM card but then you can also switch it over to another mobile network provider if your Galaxy S3 is unlock or unbranded version.
1. You may firstly removed the back cover by gently hold at the top and bottom edges and slit it upward.
2. If the battery if already inserted to it, just simply remove it by lifting at the top left.
3. Now, when the battery is removed, slit the Micro SIM into the SIM tray facing to the correct direction.
4. Put back the battery once the SIM card is already installed.
5. Then gently replace back the back cover by smoothly applying pressure along the edges
That's it! you have now your Samsung Galaxy S3 inserted with a new SIM card.
You may also visit Vodafone UK youtube channel for the video guide.
Subscribe to:
Posts (Atom)